I've recently gone through the process of launching my own blog (this one!) with Ghost hosted on Microsoft Azure and in this post I'll go into detail about how you can do it too.
Note that the Azure Portal is probably the fastest changing thing on the internet, so it's possible that this guide may be out of date when you read it. I'll do my best to keep up with the changes for your benefit.
Update (February 1, 2019)
I no longer recommend using this method to deploy Ghost to Azure. Instead, I recommend you check out Chad Lee's method on his blog here: https://www.chadly.net/ghost-on-azure/.
Chad's method makes fewer changes to Ghost to get it to work on Azure, which means it's easier to keep up to date as new versions of Ghost come out. He also walks you through setting it up with Azure CDN so it's almost free.
Get Azure
For the purposes of this post I'm going to assume that you've already got a subscription to Microsoft Azure. If not, you can register for a free trial.
Once you're all set up, login to the Azure Portal.
Create a New Resource Group
If you've already got a Resource Group that you want to use, you can skip this step.
If you're not familiar with Resource Groups, you can basically think of them as folders for logically-related resources in Azure. We're going to use this Resource Group to group together all of the Azure resources for your Ghost blog. You can read more about Resource Groups on the Microsoft Azure documentation.
Click the big + in the left-hand sidebar of the Azure Portal and search for resource group in the search box. Click Create.
Enter a name for the Resource Group, like firstlastblog as I have below. Select your Subscription and select the Resource group location nearest to you.
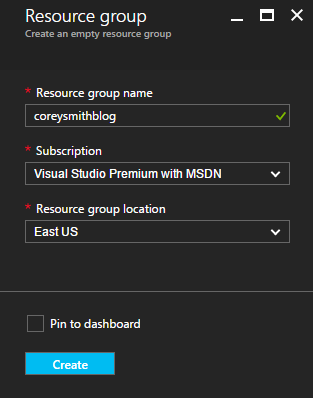
The Resource Group may take a moment to be created. Once it's finished creating, you can find it by clicking Resource Groups in the Azure Portal sidebar.
Create a New App Service Plan
If you've got an App Service Plan that you want to use for your blog, you can skip this step.
If you're not familiar with App Service Plans, you can think of them as server farms for your application. Your application is deployed to an App Service Plan, and your App Service Plan can scale as traffic to your blog increases or decreases. We will host your Ghost blog on the App Service Plan we create here. You can read more about App Service Plans on the Microsoft Azure documentation.
Click the big + in the left-hand sidebar of the Azure Portal and search for app service plan in the search box. Click Create.

Enter a name for the App Service Plan, like firstlastblog as I have below. Select your Subscription and for the Resource Group, select the Resource Group you created above. Select Windows for the Operating System and Location to be the location nearest to you or your readers. For the Pricing Tier, you have to select at least B1 Basic--the free and shared plans will not work. You can easily change this later, so it's safe to start with B1 Basic to keep costs down for now. You can read more about Pricing Tiers and their features on the Microsoft Azure documentation.

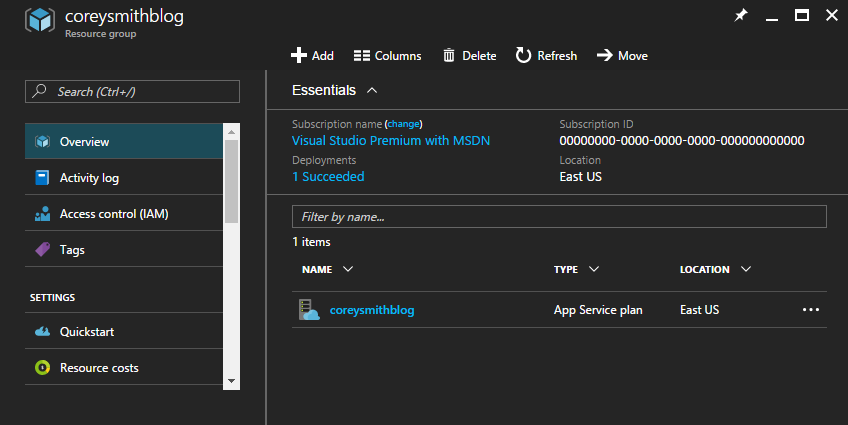
The App Service Plan may take a moment to be created. Once it's created, you can find it by clicking Resource Groups in the Azure Portal sidebar and selecting the Resource Group created above.
Create a Web App
Click the big + in the left-hand sidebar of the Azure Portal, click Web + Mobile and click Web App.
Enter a name for your web app--this determines the URL Azure will use for your blog. If you put myblog as the name, your blog will be accessible at myblog.azurewebsites.net. Of course you can add a custom domain later, so this isn't too important. Select your Subscription and for the Resource Group, select the Resource Group you created above. Select the App Service Plan you created above for App Service Plan. Set Application Insights to Off for now, you can easily change that later.

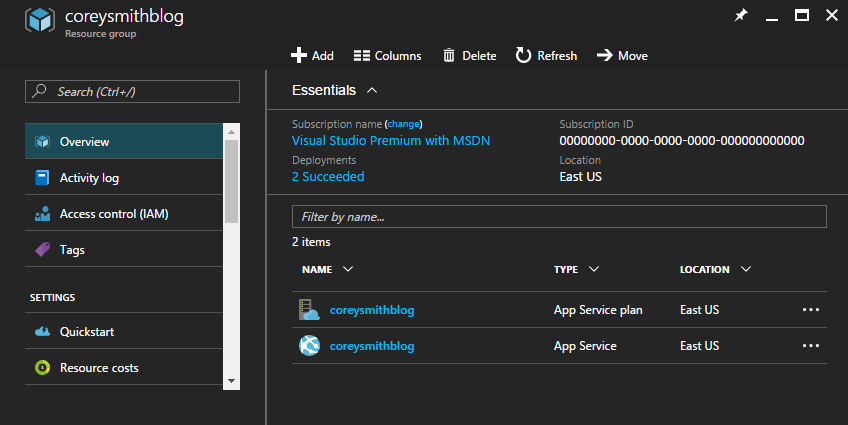
The Web App may take a moment to be created. Once it's created, you can find it by clicking Resource Groups in the Azure Portal sidebar and selecting the Resource Group created above. Notice that your Web App is called an App Service in Azure from this point forward.
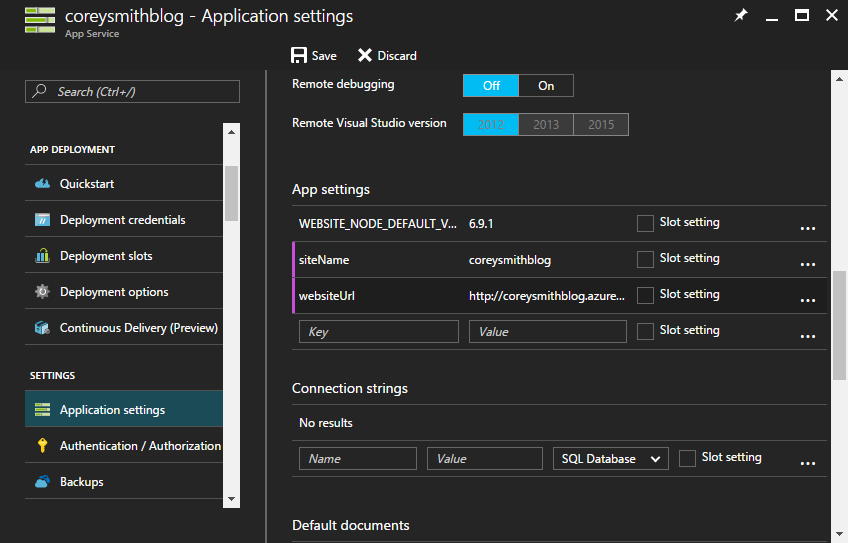
Now you need to add two App settings to your Web App. Open the Application Settings tab and under App settings create the following:
siteName- Set this to the name of your Web App. For example, I named my Web Appcoreysmithblog, so I putcoreysmithbloghere.websiteUrl- Set this to the full URL of your blog (don't leave offhttp://!). Since you haven't added a custom domain yet, set this to your Azure URL, e.g.,http://coreysmithblog.azurewebsites.net. Update this if you add a custom domain to your Web App and/or SSL certificates.
Set Up Ghost-Azure Git Repository
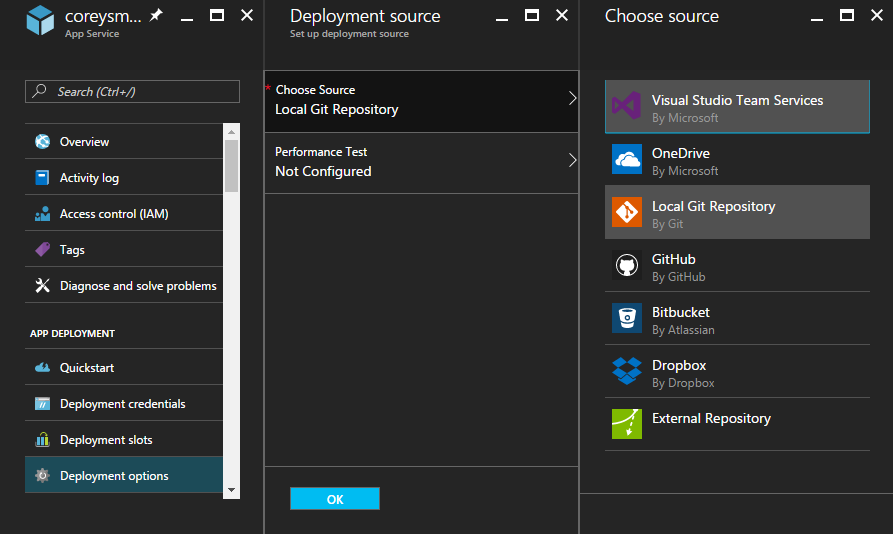
Open the Web App created above (look for the App Service resource). Click Deployment Options. Click Choose Source and choose Local Git Repository.
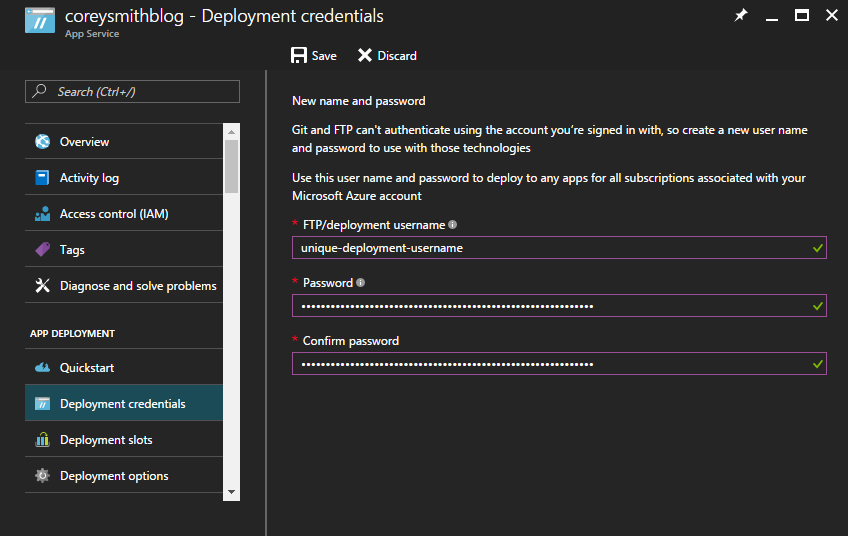
Click Deployment credentials and create a username and password for Git to use to deploy to your Web App. Make sure that you use a strong password, because the URL of your Web App's Git repository is easily guessable. Note that this username and password is universal--it will be used for deployments for all apps across all of your Azure subscriptions. If you set up a new Web App, you'll use these same credentials for deployments.
Now it's time to deploy Ghost. Some extra code needs to be added into the Ghost code base to get it to work on Azure. Luckily, Microsoft has already taken care of that for us. Clone the Ghost-Azure repository from GitHub to your hard drive using your favorite Git client.
git clone https://github.com/felixrieseberg/Ghost-Azure.git
Go back into the Azure portal and open the Overview for your Web App. Copy the Git clone url.
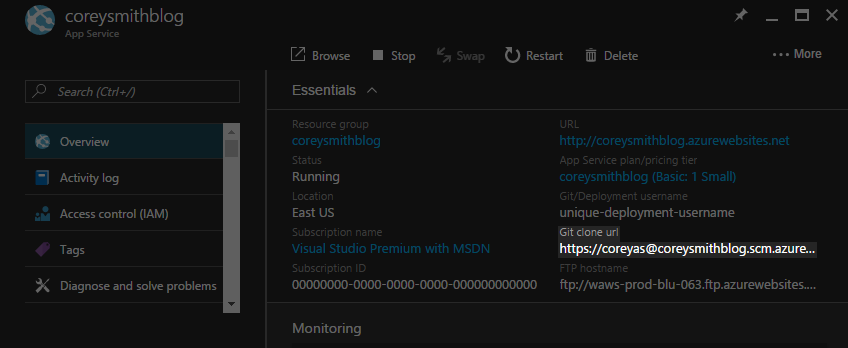
Add the Git clone url as a remote called azure to the repository you cloned.
git remote add azure https://USERNAME@WEBAPPNAME.scm.azurewebsites.net:443/WEBAPPNAME.git
Now push your code to your Web App. This will take a while (5-10 minutes) as your Web App has to download and deploy all dependencies for Ghost.
git push azure

Once the deploy finishes you can now open your Ghost blog at webappname.azurewebsites.net.
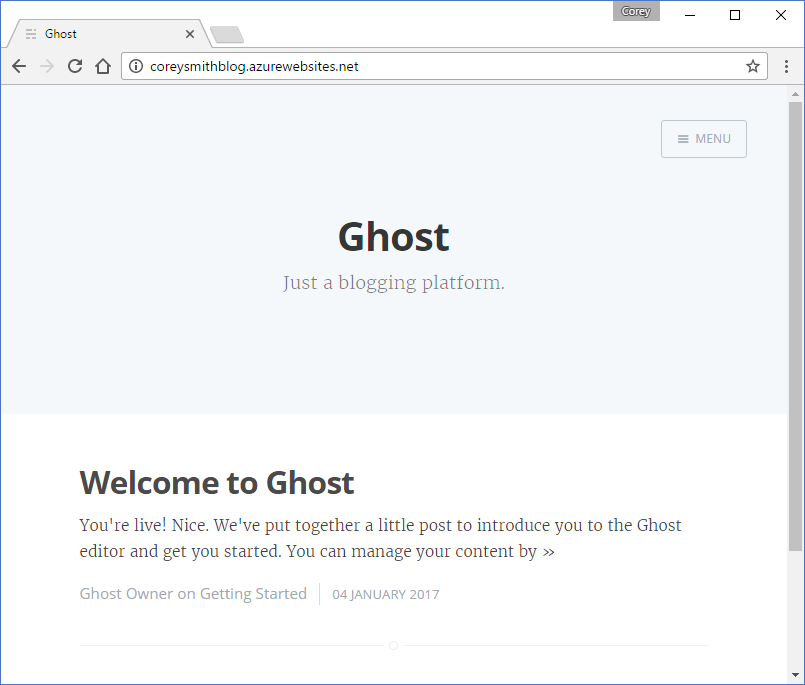
Before doing anything else, navigate to webappname.azurewebsites.net/ghost and set up your blog account with a strong password right away.
Your Ghost blog is up and running on Azure! Cool huh?
Next Steps
Now that you've got your Ghost blog up and running, you may want to do some more things to make it your own:
- Add a custom domain to your blog. This is easy--just open your Web App and follow the instructions in the
Custom domainssection. After you've added your custom domain to your Web App, go to theApplication settingssection and update thewebsiteUrlsetting to your full domain name (don't forget to addhttp://!). - Add SSL to your blog. If you have your own certificate, open your Web App and follow the instructions in the
SSL certificatessection. Additionally, create a newApp settingin your Web App calledwebsiteUrlSSLwith your full HTTPS URL, e.g., /. Update yourwebsiteURLsetting with the same value as well. If you don't have a certificate, read my blog post Secure Your Ghost Blog on Azure with Let's Encrypt. - Customize Ghost. This is easy--just make changes to your local repository and push to Azure with
git push azure, or through your favorite Git client. - Scale your blog based on traffic. Again, easy. Open the
Scale up (App Service plan)section in your Web App or App Service Plan and select anS1 Standardor higher plan, then configure auto scaling in theScale Out (App Service plan)section. - Monitor your blog's performance. Add an
Application Insightsresource to your resource group and configure tests against your Web Service. You can test things like availability from different regions, and website response times. - Set up Deployment Slots to minimize downtime. If you upgrade to the
S1 Standardor higher App Service Plan, you get access to Deployment Slots. These allow you to deploy your code to a staging environment and swap it with your live site once you're ready for your changes to go live. Configure these under theDeployment slotssection of your Web App. Read more on the Microsoft Azure documentation.
I hope this post has proven helpful. Let me know your thoughts in the comments.